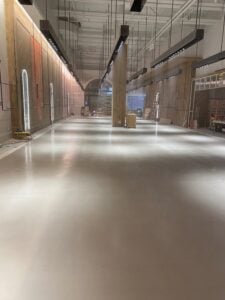
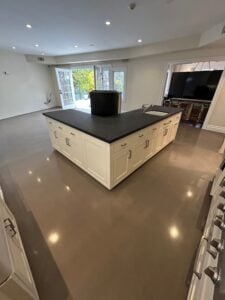
Self-leveling concrete has become a popular choice for both residential and commercial flooring projects. Not only does it provide a smooth and level surface, but when polished, it transforms into a sleek, high-performance finish that rivals traditional polished concrete. Whether you’re upgrading a garage, showroom, or living space, polished self-leveler offers a modern aesthetic with long-lasting durability.
In this post, we’ll explore the benefits, process, and tips for polishing self-leveling concrete over an existing concrete slab.
Polished self-leveler combines the best of both worlds: the ease of application of a self-leveling compound and the refined look of polished concrete. Here’s why it’s a great option:
- Smooth, seamless finish
- High durability and resistance to wear
- Low maintenance and easy cleaning
- Modern, industrial aesthetic
- Improved light reflectivity in interior spaces


Polishing self-leveling concrete is a fantastic way to achieve a high-end look with minimal hassle. It’s ideal for modern interiors, retail spaces, and anywhere you want a clean, durable, and visually striking floor. With the right materials and technique, you can transform a basic concrete slab into a polished masterpiece.
We finally have the answer for getting into corners. This has been a major problem in the industry, and our research and development into this problem has resulted in a simple, low cost corner tool kit.
This kit consists of finger and triangle tools that fit onto an oscillating Multi Tool. The 40 grit tools will grind down lippage in corners with ease for most floors while the 20 grit finger tools is for very hard floors. Included are two rasps for removing paint or glue and a triangle hook pad for attaching resin pads to finish the polishing.
Two more important steps along the way:
1. Hardening the surface
Polished concrete floors usually have the surface hardened with a chemical before the second, third or fourth grinding pass. The chemical soaks into the floor and causes a chemical reaction that hardens (densifies) the floor to produce a high shine when the polishing is finished and to increase the wear resistance of the floor. This process is often repeated at different stages to obtain the best possible finish.
2. Filling holes (grouting)
After the first concrete grinding pass, removing the top layer of concrete paste – millions of tiny air holes will be exposed. If these are not filled before the hardening process then the final polished concrete floor will show these unsightly imperfections. The holes can be filled with an acrylic tile adhesive type of product mixed with grinding dust and cement powder which is hand scraped across the floor using a trowel.
Other rubberized adhesives can be sprayed ahead of the grinder, or the floor can be wet with water and the adhesive splashed across the floor so that the diamonds mix it into the holes with the grinding dust on the third or fourth pass at around 120 grit. We have incorporated this process with the densifying step to save at least one pass.


