
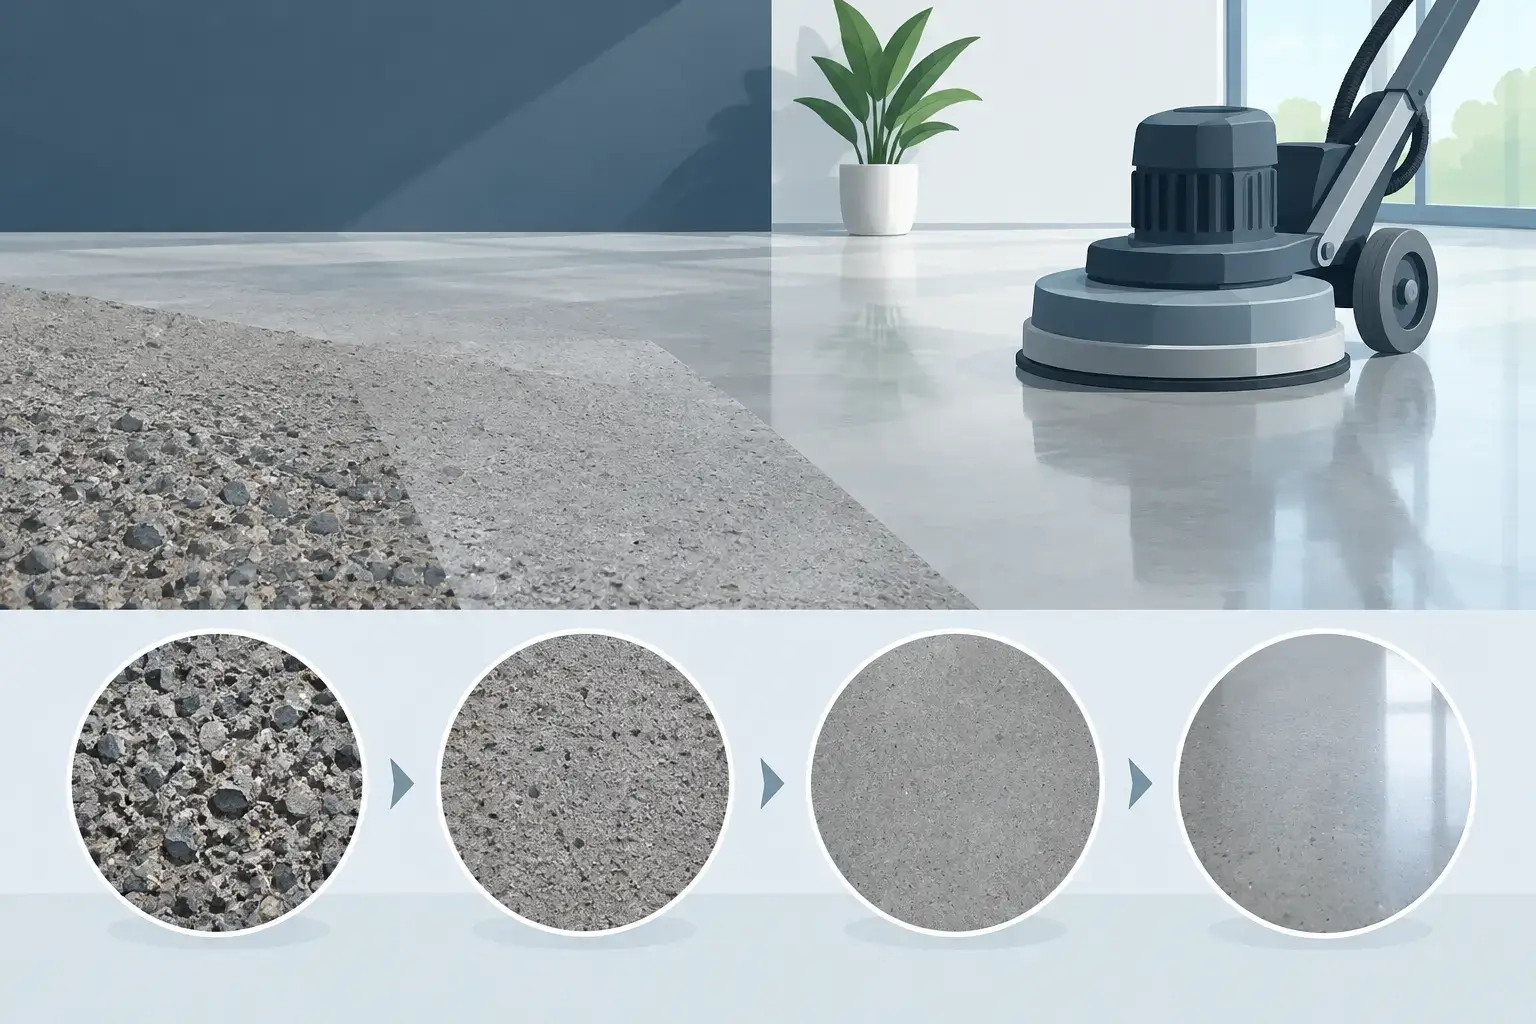
A floor can look clean and still be a poor candidate for a coating, overlay, or bonded repair. The deciding factor is often not the concrete’s age or color. It is its texture at a microscopic level. This concrete surface profile guide explains how that texture affects adhesion, appearance, project cost, and long-term floor performance.
For warehouses, retail spaces, offices, and residential lofts, surface preparation is not a minor preliminary step. It is the foundation of the entire flooring system. Select the wrong profile and even a premium coating or topping can delaminate, wear prematurely, or telegraph unwanted flaws through the finished surface.
What Is a Concrete Surface Profile?
Concrete surface profile, commonly called CSP, describes the roughness of a prepared concrete surface. The scale generally runs from CSP 1, which is nearly smooth, through CSP 10, which is heavily roughened and aggressively fractured. Contractors use these profile levels to match a slab preparation method with the material being installed.
A profile is more than visible texture. It creates the mechanical bond that helps a coating, mortar, repair material, or cementitious overlay grip the concrete. The proper profile also removes weak laitance, contaminated material, failed coatings, and unstable surface paste that would otherwise compromise the installation.
The right CSP depends on the specified flooring system, the slab condition, and how the area will be used. A polished concrete floor requires a very different starting condition than a thick industrial topping designed for forklifts and thermal movement.
Concrete Surface Profile Guide: CSP Levels Explained
The CSP range gives owners, architects, and contractors a common language for preparation requirements. It is often compared against standardized visual chips, but field conditions still matter. A slab may have a generally consistent profile while containing isolated areas with adhesive residue, spalls, oil contamination, or moisture-related deterioration that require additional work.
CSP 1 to CSP 2: Light Preparation
CSP 1 is a lightly abraded, nearly smooth surface. It may be achieved through light diamond grinding or other gentle mechanical abrasion. CSP 2 has slightly more tooth while remaining relatively even.
These low-profile surfaces are common when applying thin-film coatings, clear protective systems, stains, dyes, or certain moisture mitigation products. They are also relevant during early grinding stages for polished concrete, although polishing is a separate process with its own sequence of metal and resin diamond passes.
A low CSP is not automatically easier or cheaper. The surface still needs to be clean, sound, and open enough for the selected material. If a thin coating is placed over a slab with hidden contaminants, no amount of gloss will correct a bond failure.
CSP 3 to CSP 5: The Workhorse Range for Coatings and Overlays
CSP 3 through CSP 5 is where many commercial floor projects land. These profiles are typically produced by diamond grinding, shot blasting, scarifying, or a combination of methods. The texture is distinct enough to support stronger mechanical bonding without becoming excessively rough for a medium-build system.
This range is frequently specified for epoxy flooring, urethane cement, thicker resinous systems, self-leveling underlayments, and many cementitious overlays. The correct level within the range depends on product thickness. A thin coating cannot fill a deep profile cleanly, while a thicker overlay may need more texture to resist shear and traffic stresses.
For an active Los Angeles warehouse or retail facility, this is also the range where preparation planning directly affects downtime. Shot blasting can prepare large open areas efficiently, while diamond grinding may offer greater control near walls, shelving, drains, and occupied work zones. The best method depends on the slab and the operating environment, not just square footage.
CSP 6 to CSP 10: Heavy-Duty Bonding Profiles
Higher CSP levels are visibly aggressive. They are used when installing thick repair mortars, heavy-duty toppings, structural overlays, or systems that need a deep mechanical key. Scarifying, bush hammering, milling, and high-impact removal methods can create these rougher profiles.
CSP 6 to CSP 10 may be necessary for severely deteriorated concrete or substantial topping applications, but more aggressive is not always better. A heavy profile beneath a thin system can leave ridges and valleys that show through the finish, consume extra material, and create uneven wear. It can also expose weak aggregate or introduce damage that must be repaired before installation.
How to Choose the Right Surface Profile
Start with the flooring system manufacturer’s written preparation requirements. Those requirements should identify the recommended CSP range, required concrete strength, moisture limits, and cleaning standards. Product compatibility must lead the decision. A beautiful finish is meaningless if the material is not bonded to a properly prepared slab.
Next, consider thickness. Thin-film coatings generally need a finer profile, while thicker toppings and repair mortars need deeper texture. Then evaluate traffic. Forklifts, pallet jacks, rolling carts, point loads, chemical exposure, and frequent washdowns place greater demands on both the bond and the finished system.
The desired appearance matters as well. Polished concrete is built through progressive refinement, not by aggressively roughening a floor and applying a shine product. If the goal is a salt-and-pepper polish, a cream finish, or a more exposed aggregate appearance, the existing slab and diamond sequence determine what can be achieved. Repairs, previous coatings, and uneven aggregate exposure may affect the final visual consistency.
Surface Preparation Is More Than Achieving a CSP Number
A CSP target is essential, but it is only one part of proper concrete preparation. Before any coating, topping, or polish work begins, the slab needs a complete condition assessment. This includes checking for cracks, delamination, soft concrete, prior adhesives, oil saturation, curing compounds, and existing coatings.
Moisture testing is especially critical. Southern California properties often have slabs with unknown vapor barriers, old construction details, or moisture conditions that do not become obvious until a floor system is installed. A properly profiled surface can still fail if vapor pressure exceeds the flooring system’s limits. When necessary, a compatible moisture control system must be incorporated into the scope.
Surface flatness and drainage also deserve attention. Industrial coatings may tolerate different conditions than a decorative polished floor. An overlay may correct some irregularities, but it cannot solve every drainage issue without proper design and material depth. Honest evaluation before production begins protects the budget and prevents change orders after the building is occupied.
Common Profile Mistakes That Cost More Later
The most expensive mistake is applying a system over an unprepared or poorly cleaned slab. Acid etching, for example, may create some surface texture under limited conditions, but it does not reliably remove contaminants, correct weak concrete, or provide the controlled profile needed for demanding commercial systems. Mechanical preparation is typically the more dependable solution for high-performance floors.
Another mistake is treating all concrete the same. A new warehouse slab, a decades-old retail floor beneath adhesive, and a residential garage with oil intrusion demand different preparation strategies. Specifying a generic grinding pass without investigating the substrate often leads to uneven results and preventable repairs.
Finally, do not confuse a rough surface with a ready surface. Dust must be removed, edges must be addressed, cracks must be evaluated, and the final profile must be consistent with the system being installed. Quality control during preparation is what separates a floor that performs for years from one that begins failing under normal use.
Why Method Selection Matters
Diamond grinding offers precision and is often the preferred method when a project needs controlled material removal, coating removal, edge work, or a polished concrete finish. Shot blasting can efficiently produce an even profile across large, open spaces, especially where coatings or overlays are planned. Scarifying and milling are more aggressive options for thicker removal and heavy-duty surface restoration.
Each method has trade-offs in dust control, access, noise, production rate, and resulting texture. The strongest contractors do not force one machine or one process onto every job. They match the equipment and diamond tooling to the slab, specification, and operating schedule.
Los Angeles Concrete Polishing approaches surface preparation as the performance phase of the project, not a shortcut before the visible finish. That discipline helps commercial and residential clients receive floors that look intentional, handle real traffic, and remain easier to maintain.
Before approving any coating, overlay, or polishing scope, ask for the specified CSP range, the preparation method, and the plan for moisture and concrete repairs. Those answers will tell you far more about the expected life of your floor than a finish sample alone.
Clients We Service
We provide our concrete polishing and related services to a wide variety of clients. Some of the types of clients that we provide service to include:


